Exploring Vendure APIs Through Preconfigured Postman Collections
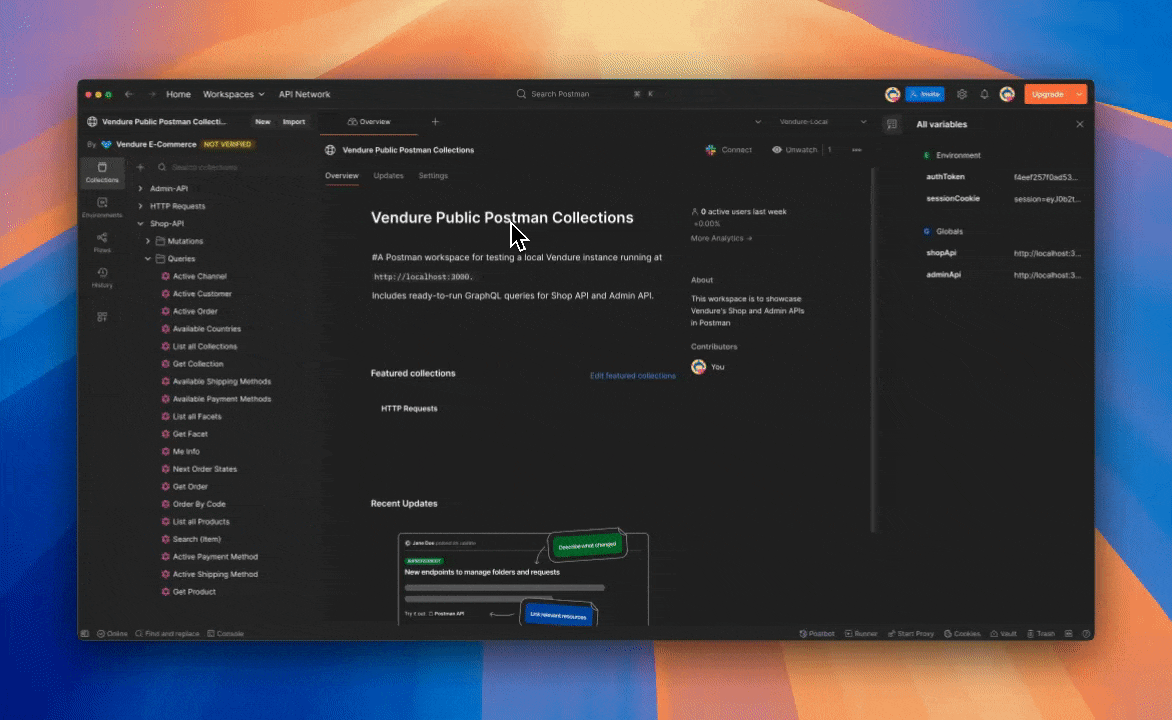
The Official Vendure Postman Collections Workspace
Prerequisites
Before you begin, ensure you have the following:
- A local instance of Vendure running. Refer to the Getting Started with Vendure guide.
- The Postman desktop app installed.
- A free Postman account to enable forking.
Getting Started with Postman
Getting started is as simple as forking the collection and an accompanying environment, configuring a few variables, and making your first API call.
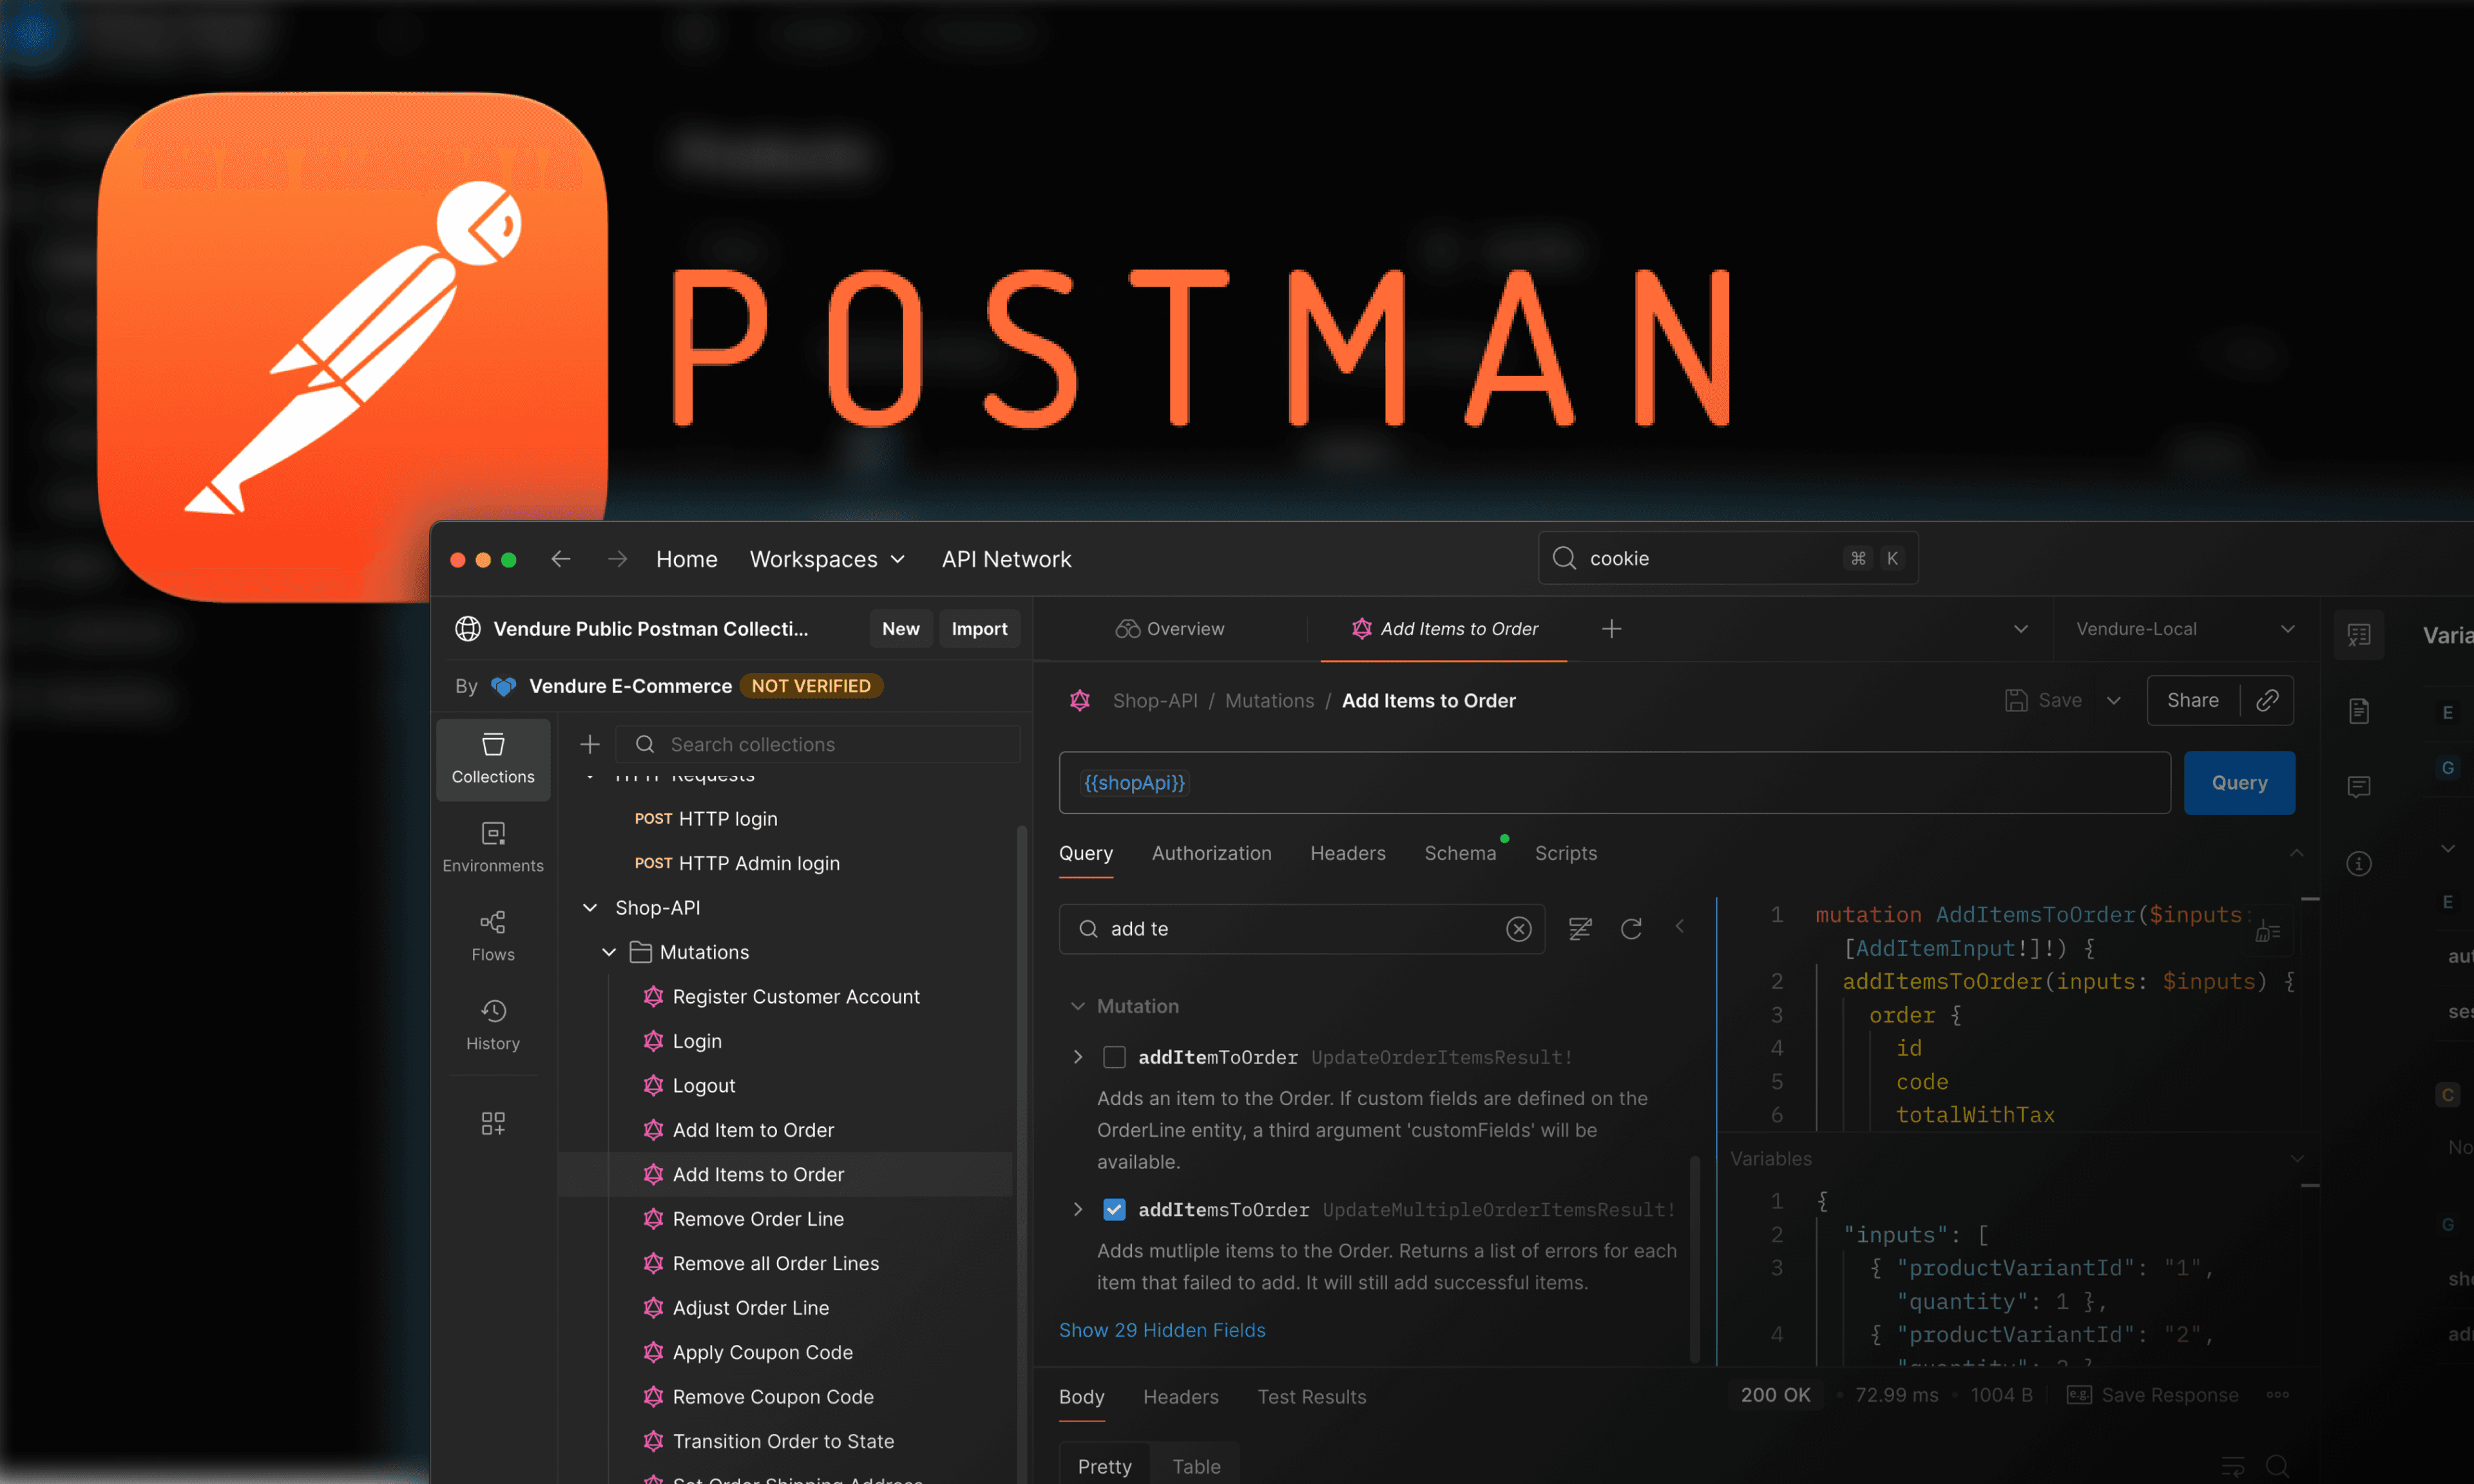
1. Fork a Collection and Environment
First, you need to fork a collection from the Vendure Public Postman Collections** **workspace into your own. Forking creates a copy that you can freely modify.
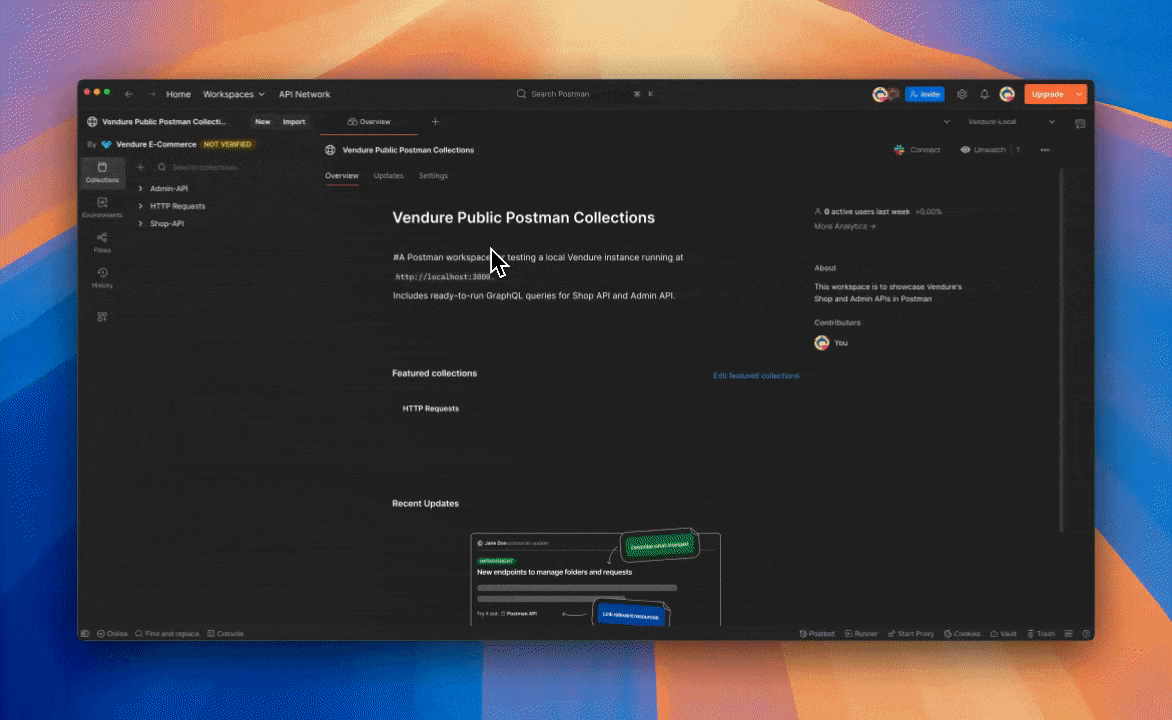
- Navigate to the Vendure public Postman workspace using the link provided.
- In the left sidebar, navigate to the collection you want to use, either Shop-API or Admin-API.
Note: The Admin API collection is a work in progress.
- Right-click on the collection and select Create a fork.
- Give your fork a label and select the workspace where it should be saved.
- Repeat the process for the "Vendure-Local" environment, which is provided alongside the collections. Forking the environment is essential for the requests to work correctly. (Found on the right sidebar)
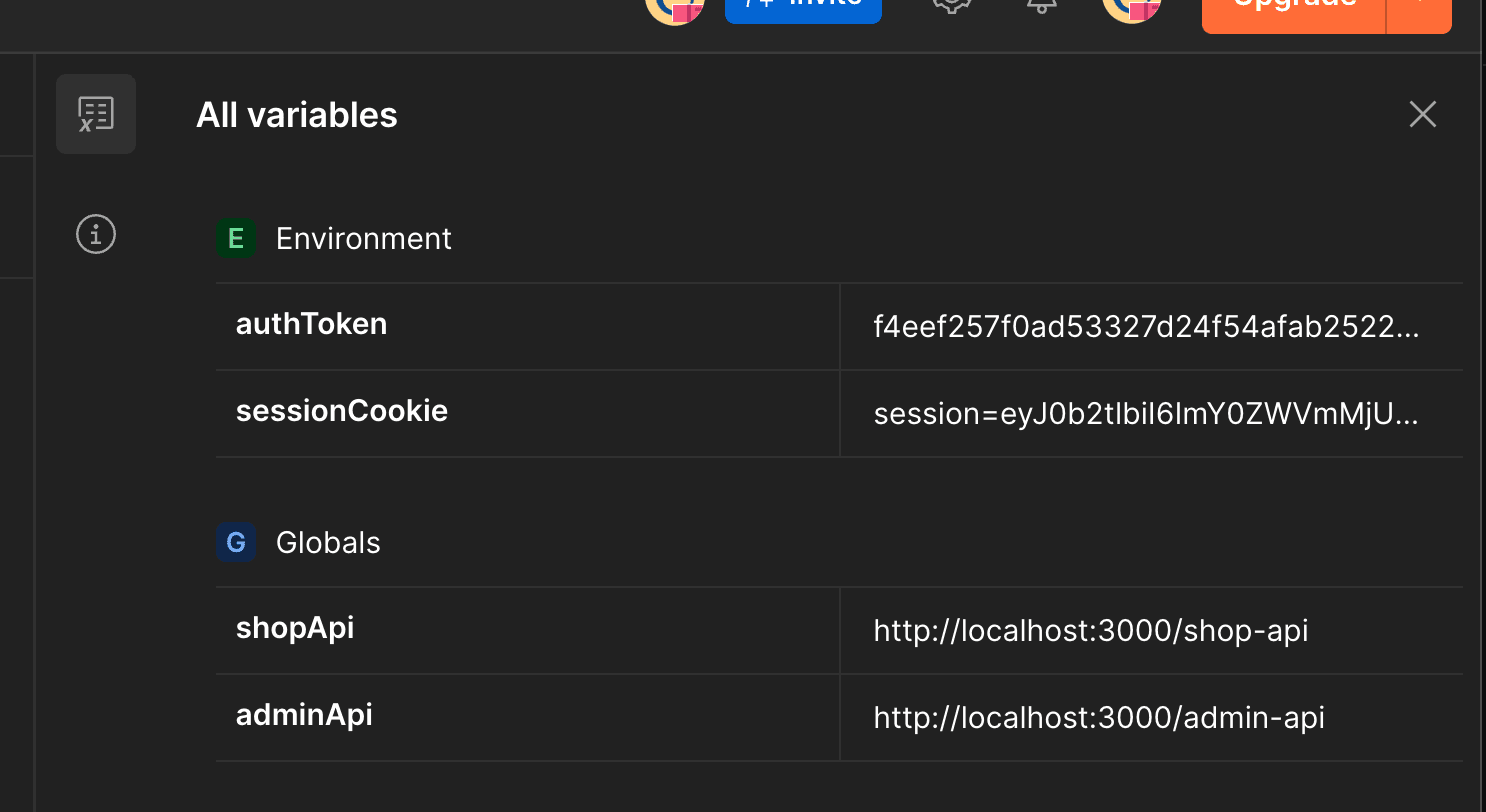
2. Configure Your Environment Variables
Your forked environment holds the variables that connect Postman to your local Vendure instance.
- In your Postman workspace, navigate to the Environments tab and select your forked "Vendure-Local" environment.
- In the Current Value column, set the values for the following global variables:
- shopApi: The full URL to your Shop API. By default, this is
http://localhost:3000/shop-api. - adminApi: The full URL to your Admin API. By default, this is
http://localhost:3000/admin-api.
Tip: Using the "Current Value", instead of “Initial Value” field keeps your sensitive credentials from being synced if your workspace is public.
3. Authenticate and Get a Token
Some API calls, particularly those that are attached to a user, require you to be authenticated when making a request.
- In your forked collection, expand the Admin-API folder and select the HTTP login request, or HTTP Admin login for admin privileges.
- Ensure your forked "Vendure-Local" environment is selected in the top-right dropdown.
- Click Send.
A successful request will return a 200 OK status and the user's details. The collection is configured to automatically extract the session cookie token from the response headers and save it to your environment through the pre-configured scripts, so you can immediately start making other authenticated requests.
**Note: **Authentication for requests is configured in the **Headers **tab through the Cookie field, which uses the **sessionCookie **environment variable in each request.
4. Explore the API
You are now ready to explore. Try querying for products from the Shop API or creating a new customer through the Admin API. Each request in your forked collection is pre-configured to use your environment variables and the authentication token.
Further Reading
To learn more about the concepts demonstrated in this guide, check out the official Vendure documentation:
Share this guide